
Protect your concrete install a moisture barrier now
How to install a moisture barrier on a concrete floor is a crucial step in ensuring the longevity and integrity of your flooring. A moisture barrier prevents moisture from the concrete slab from migrating upward and damaging your flooring materials. It acts as a protective layer, safeguarding against mold, mildew, and other moisture-related issues. Installing a moisture barrier is a relatively straightforward process that can be done with the right tools and materials.
There are various types of moisture barriers available, including polyethylene sheeting, vapor retarders, and moisture-resistant underlayments. Each material has its pros and cons, and the best choice will depend on the specific needs of your project. Before installation, it is crucial to prepare the concrete floor properly. This includes cleaning, drying, and patching any cracks or imperfections. Following these steps will ensure a successful installation and a durable, moisture-proof floor.
how to install a moisture barrier on concrete floor
Installing a moisture barrier on a concrete floor is crucial for protecting your home from moisture damage and creating a healthy living environment. Whether you’re preparing for new flooring or simply want to prevent mold and mildew growth, understanding the process is essential. This article will guide you through the steps of installing a moisture barrier on a concrete floor, ensuring you get the best results.
Why Install a Moisture Barrier on Concrete Floor?
Concrete floors are naturally porous, meaning they can absorb moisture from the ground, humidity, or even spills. This moisture can lead to several problems, including:
- Mold and Mildew Growth: Damp environments create the perfect breeding ground for harmful mold and mildew, affecting your health and causing structural damage.
- Floor Damage: Wood flooring and other materials are susceptible to warping, rotting, and discoloration when exposed to excess moisture.
- Structural Issues: Moisture can seep into the concrete itself, weakening its integrity and leading to cracks and other structural issues.
By installing a moisture barrier, you create a protective layer between the concrete and your flooring, preventing moisture from reaching the vulnerable surfaces and causing damage.
Choosing the Right Moisture Barrier for Your Project
The type of moisture barrier you choose depends on the specific requirements of your project. Here are some common options:
- Polyethylene Sheeting: Affordable and widely available, polyethylene sheeting provides a basic moisture barrier. It’s often used for crawl spaces and under concrete slabs.
- Vapor Retarders: These specialized membranes offer higher resistance to moisture vapor transmission. They’re commonly used for finished basements and under hardwood floors.
- Moisture Barrier Paint: This type of paint acts as a sealant, preventing moisture from penetrating the concrete surface. It’s often used for areas with high humidity levels.
When choosing your moisture barrier, consider:
- The level of moisture expected in the area: High moisture levels require a stronger barrier.
- The type of flooring you’re installing: Different flooring materials have different moisture resistance levels.
- Your budget: Moisture barriers vary in cost, so choose an option that fits your financial constraints.
Preparing the Concrete Floor for Moisture Barrier Installation
Before installing a moisture barrier, it’s essential to properly prepare the concrete floor. Follow these steps for optimal results:
- Clean the Floor: Thoroughly clean the concrete floor with a stiff brush and a mild detergent. Remove any debris, dirt, or loose particles that could hinder the moisture barrier’s effectiveness.
- Repair Cracks and Imperfections: Fill any cracks, holes, or uneven surfaces with concrete patching compound or epoxy filler. Allow the patching compound to cure completely before proceeding.
- Let the Floor Dry: Ensure the concrete floor is completely dry before installing the moisture barrier. This may require using a dehumidifier or allowing the floor to air dry for several days.
Installing the Moisture Barrier on a Concrete Floor
Once the concrete floor is prepared, you can start installing the moisture barrier. The specific installation process may vary depending on the type of barrier you choose. However, the general steps are as follows:
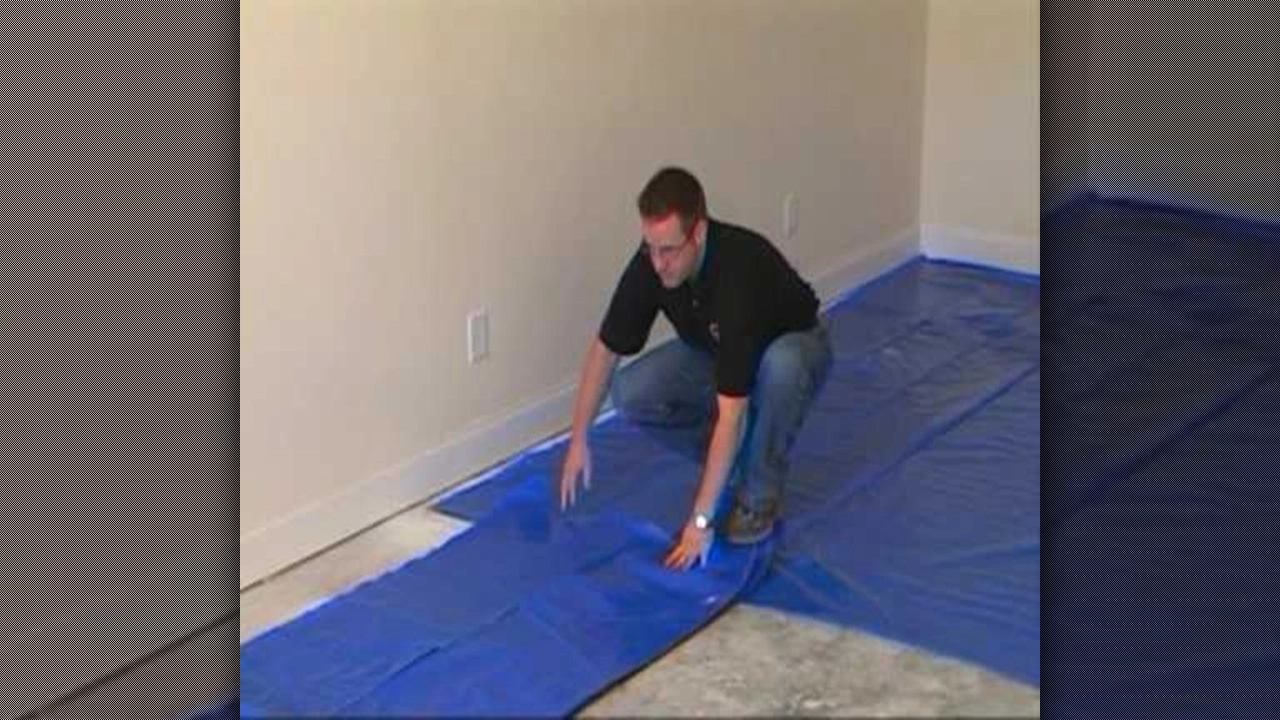
- Lay Down the Moisture Barrier: Unroll the moisture barrier material and lay it flat on the concrete floor. Overlap the seams by at least 6 inches to create a continuous seal.
- Secure the Moisture Barrier: Secure the moisture barrier using a suitable adhesive or tape. Make sure the adhesive is compatible with the specific type of moisture barrier you’ve chosen.
- Seal the Edges: Seal all edges of the moisture barrier with a sealant tape or caulk. This prevents moisture from entering at the edges.
- Install Additional Layers: If required, add additional layers of moisture barrier for increased protection. Ensure the layers overlap properly to prevent moisture leaks.
Installing a Moisture Barrier on a Concrete Floor: Step-by-Step Guide
Here’s a more detailed breakdown of the installation process using polyethylene sheeting:
- Measure and Cut: Measure the area you need to cover and cut the polyethylene sheeting to the appropriate size. Leave extra material for overlapping seams.
- Overlap Seams: Overlap the sheets by at least 6 inches.
- Secure with Tape: Secure the seams and edges with moisture-resistant tape. Use a heavy-duty tape specifically designed for concrete applications.
- Apply Sealant: Apply a sealant along the edges of the moisture barrier to ensure a tight seal.
Essential Tips for Installing a Moisture Barrier on a Concrete Floor
- Use the right tools: A utility knife, tape measure, and roller are essential tools for installing a moisture barrier.
- Work in a well-ventilated area: Ensure proper ventilation when applying adhesives or sealants.
- Avoid gaps and creases: Ensure the moisture barrier is laid flat and free of gaps and creases to prevent moisture leaks.
- Inspect for leaks: After installation, inspect the moisture barrier for any leaks or gaps. Repair any issues immediately.
Common Mistakes to Avoid When Installing a Moisture Barrier
- Not properly preparing the concrete floor: Skipping cleaning and patching can lead to moisture leaks and ineffective moisture barrier installation.
- Using the wrong adhesive or tape: Using incompatible materials can lead to premature failure of the moisture barrier.
- Not overlapping seams properly: Inadequate seam overlap allows moisture to seep through, compromising the barrier’s effectiveness.
- Installing the barrier on damp concrete: Installing a moisture barrier on a damp surface will create a breeding ground for mold and mildew.
Maintaining Your Moisture Barrier
To ensure your moisture barrier continues to function properly, regular maintenance is crucial.
- Inspect regularly: Inspect the moisture barrier for any signs of damage, wear and tear, or leaks.
- Repair any damage: Repair any damaged areas promptly to prevent moisture from penetrating.
- Keep the area clean: Regularly clean the concrete floor to remove dirt, debris, and spills that could compromise the moisture barrier’s effectiveness.
Frequently Asked Questions About Installing Moisture Barrier on Concrete Floor
Q: How long does it take for a moisture barrier to dry? A: Most moisture barriers dry within 24 hours, but it’s always best to consult the manufacturer’s instructions.
Q: Can I install a moisture barrier on a concrete floor that’s already been sealed? A: Yes, you can install a moisture barrier on a sealed concrete floor. However, it’s essential to choose a moisture barrier compatible with the existing sealant.
Q: Can I use a vapor barrier instead of a moisture barrier? A: While vapor barriers are designed to prevent moisture vapor transmission, they may not be as effective in blocking liquid moisture. If you’re concerned about liquid moisture, it’s best to use a moisture barrier.
Q: How often should I replace a moisture barrier? A: The lifespan of a moisture barrier depends on the material and the conditions it’s exposed to. Typically, they last for several years, but it’s a good idea to inspect and replace them as needed.
Conclusion
Installing a moisture barrier on a concrete floor is a critical step in creating a healthy and safe living environment. By following these guidelines, you can ensure a successful installation and protect your home from moisture damage. Remember to choose the right moisture barrier for your project, properly prepare the floor, and follow the installation instructions carefully. With proper installation and maintenance, your moisture barrier will provide long-lasting protection for your concrete floors.
is your concrete floor leaking moisture this simple trick will stop it
Concrete floors, while durable and affordable, often present a challenge: moisture. This can cause problems like warping, mold growth, and unpleasant odors in your home. Installing a moisture barrier is a crucial step to prevent these issues and create a healthier, more comfortable living space. But how do you go about it?
Understanding the Importance of a Moisture Barrier
Before tackling the installation process, it’s essential to understand why a moisture barrier is necessary. Concrete is porous, meaning it absorbs moisture from the ground. This moisture can then migrate upwards, causing problems for your flooring and potentially affecting the structural integrity of your home. A moisture barrier acts as a shield, preventing this moisture from reaching your flooring.
Choosing the Right Moisture Barrier
There are various types of moisture barriers available, each with its own pros and cons. The most common are:
- Polyethylene (PE) sheeting: A budget-friendly option, PE sheeting is easy to install and provides good moisture resistance. However, it’s not as strong as other options and can be susceptible to punctures.
- Polypropylene (PP) sheeting: Offering greater tear and puncture resistance than PE sheeting, PP sheeting is a more durable choice. It’s also slightly more expensive.
- Vapor retarder paint: Applied directly to the concrete, vapor retarder paint provides a continuous barrier against moisture. It’s a good option for areas where there’s limited space for sheeting installation.
Preparing the Concrete Floor for Installation
Before installing any moisture barrier, ensure your concrete floor is properly prepared. This involves:
- Cleaning: Remove any debris, dust, and loose particles from the floor.
- Repairing: Fill in cracks and gaps with a suitable patching compound.
- Drying: Allow the concrete to dry completely before proceeding.
How to Install a Moisture Barrier on Concrete Floor
Now that you have a clean and dry concrete floor, let’s install the moisture barrier. Here’s a step-by-step guide for how to install a moisture barrier on concrete floor:
1. Laying Down the Sheeting:
- Measure and Cut: Measure your flooring area and cut the sheeting to size, ensuring it overlaps each sheet by at least 6 inches.
- Lay the Sheeting: Start from one corner of the room and lay the sheeting down, overlapping it with each consecutive sheet. Ensure the sheeting is smooth and free of wrinkles.
- Secure the Sheeting: Use duct tape to securely fasten the sheeting at the seams and around the edges of the room.
2. Applying Vapor Retarder Paint:
- Stir Thoroughly: Stir the paint thoroughly before applying it to the concrete surface.
- Apply in Even Coats: Apply two coats of paint, allowing the first coat to dry completely before applying the second.
- Ensure Coverage: Ensure that the entire concrete surface is covered in a continuous layer of paint.
3. Additional Tips:
- Ventilation: Ensure your home is well-ventilated during and after the installation process.
- Moisture Test: Before installing flooring, conduct a moisture test to confirm that the moisture barrier is effective.
- Consult a Professional: If you have any concerns about the installation process, consult with a professional contractor.
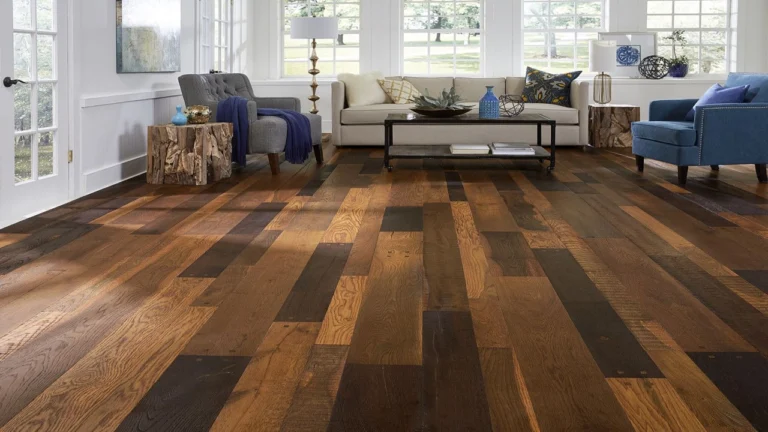
Choosing the Right Flooring
After installing the moisture barrier, you can choose your flooring. Remember to consider your chosen moisture barrier when selecting the right flooring material. For example, if you’ve installed a polyethylene sheeting, you can opt for wood flooring, laminate flooring, or even tile. However, if you’ve used a vapor retarder paint, you might need to consider other options like vinyl flooring or carpet.
Installing a Moisture Barrier on Concrete Floor: FAQs
- How often should I install a moisture barrier?
- It’s generally recommended to install a moisture barrier on all concrete floors, especially in areas with high humidity or where you plan to install wood flooring.
- Can I install a moisture barrier over existing flooring?
- It is possible to install a moisture barrier over existing flooring, but it may require professional help to remove and reinstall the existing flooring.
- Can I use plastic sheeting for a moisture barrier?
- While plastic sheeting can be used, it’s not as effective as specialized moisture barriers.
By following these steps, you can effectively protect your home from moisture damage and enjoy a healthier, more comfortable living environment. Remember, how to install a moisture barrier on concrete floor is an important step in any home improvement project.
Q&A: Moisture Barrier on Concrete Floors
Q1: Why do I need a moisture barrier on my concrete floor?
A: A moisture barrier prevents moisture from the concrete slab from migrating into your flooring materials, which can cause warping, buckling, mold, and other problems. It’s crucial for creating a healthy and durable floor.
Q2: What are the most common types of moisture barriers?
A: The most common types are:
- Polyethylene sheets: These are relatively inexpensive and easy to install.
- Vapor retarders: These are more sophisticated and can offer higher protection against moisture. They come in various materials like foil, asphalt-based, and plastic films.
- Concrete sealers: These create a protective layer on the concrete surface, preventing moisture from passing through.
Q3: How do I choose the right moisture barrier for my project?
A: Consider these factors:
- Moisture levels in the concrete: A high-permeability concrete requires a stronger barrier.
- Type of flooring: Some floors are more susceptible to moisture damage than others.
- Budget: Different barriers have different price points.
Q4: How do I install a moisture barrier on my concrete floor?
A: Installation steps may vary depending on the type of barrier. Generally, you’ll need to:
- Prepare the concrete by cleaning and smoothing it.
- Lay down the barrier, ensuring it overlaps at least 6 inches at the seams.
- Secure the barrier with tape or adhesive.
- Install your flooring on top of the barrier.
Q5: Can I install the barrier directly on top of the concrete?
A: It’s best to leave a small air gap between the concrete and the barrier. This allows air circulation and helps prevent moisture buildup.
Q6: Can I use a moisture barrier on a concrete slab that’s already been poured?
A: Yes, you can install a moisture barrier on an existing concrete slab, but it may require additional preparation.
Q7: How do I know if my concrete floor is too wet for a moisture barrier?
A: You can use a moisture meter to test the concrete’s moisture content. Alternatively, you can use the “plastic sheet test” by taping a piece of plastic down on the floor for 24 hours and observing if condensation forms.
Q8: What are the benefits of installing a moisture barrier?
A: Installing a moisture barrier can prevent:
- Warping and buckling of flooring
- Mold and mildew growth
- Structural damage to the building
- Health issues caused by moisture
Q9: What are some common mistakes people make when installing a moisture barrier?
A: Common mistakes include:
- Not properly overlapping the seams
- Installing the barrier too close to the concrete
- Using the wrong type of barrier for the situation
- Not properly securing the barrier
Q10: How can I learn more about installing a moisture barrier on my concrete floor?
A: Consult with a flooring specialist or a contractor for advice and guidance. You can also find helpful resources online and in DIY manuals.
Conclusion
Installing a moisture barrier on your concrete floor is an essential step to prevent moisture damage and ensure a healthy and comfortable living environment. By choosing the right material, preparing the surface properly, and following the installation steps carefully, you can effectively protect your floors from moisture intrusion. Remember to always prioritize safety and wear appropriate protective gear during the process.
We’d love to hear your experiences with installing moisture barriers! Have you tried any other methods or encountered any challenges? Share your thoughts in the comments below. Don’t forget to share this post on social media to help others protect their homes from moisture damage.