Transform your fireplace build a stunning surround
Building a fireplace surround is a rewarding DIY project that can transform your living space. From classic brick to elegant stone, the options are endless. This guide will take you through the process step-by-step, from planning and materials to installation and finishing touches.
We’ll cover everything you need to know, including choosing the right materials, preparing your fireplace, and ensuring a safe and stylish installation. Whether you’re a seasoned DIYer or a beginner, this guide will help you create a stunning fireplace surround that enhances your home’s character.
build a fireplace surround like a pro
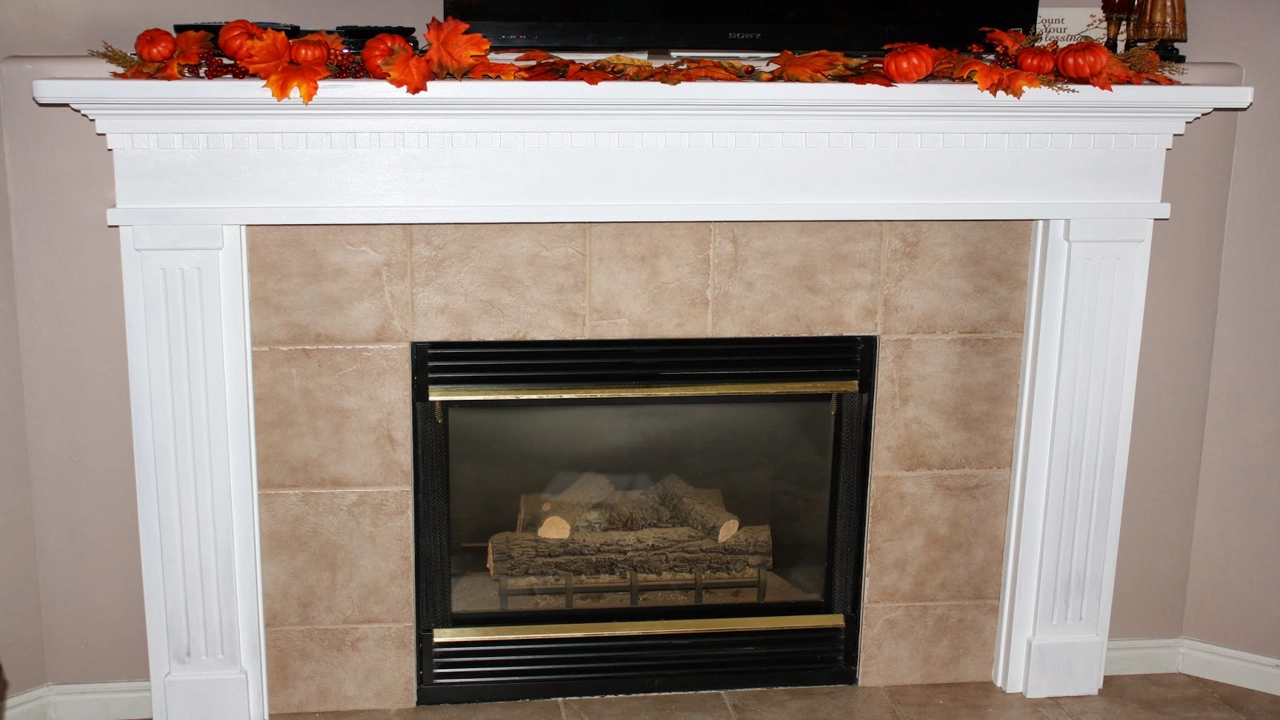
Building a Fireplace Surround: A Step-by-Step Guide
A fireplace surround can transform your living space, adding warmth, character, and a focal point to your room. It’s a DIY project that can be tackled by anyone with basic carpentry skills and a little patience. In this comprehensive guide, we’ll walk you through the process of building a fireplace surround, from planning to finishing touches.
1. Planning Your Fireplace Surround
Before diving into the construction, it’s crucial to plan your fireplace surround carefully. This includes determining the style, materials, and dimensions that will suit your needs and complement your existing décor.
- Style: Do you prefer a classic, modern, rustic, or contemporary look? Consider the architectural style of your home and the existing fireplace design.
- Materials: Common materials for fireplace surrounds include wood, stone, brick, tile, and drywall. Each material offers different aesthetics and levels of complexity.
- Dimensions: Measure the existing fireplace opening carefully. Consider how much space you want to add around the opening, the height of the surround, and the overall size of the project.
- Budget: Determine a realistic budget for materials, tools, and potential help from a professional contractor.
2. Gathering Your Materials and Tools
Once you have a clear vision of your fireplace surround, gather the necessary materials and tools. The specific materials will vary depending on your chosen style and design. Here is a general list:
-
Materials:
- Framing lumber: 2x4s or 2x6s for the frame
- Sheathing: Plywood, MDF, or OSB
- Finish material: Wood, stone, brick, tile, or drywall
- Adhesive: Mortar or construction adhesive depending on the finish material
- Caulking: To seal gaps and prevent drafts
- Paint or stain: For finishing the wood or drywall
- Fasteners: Screws, nails, and staples
-
Tools:
- Tape measure and level
- Saw (circular, miter, jigsaw)
- Hammer and nail gun
- Screwdriver and drill
- Safety glasses and gloves
- Caulk gun
- Paint brush or roller
3. Building the Frame
The frame serves as the foundation for your fireplace surround, providing a solid structure for the finish materials.
- Measure and cut: Measure the dimensions of your existing fireplace opening and determine the desired size of your surround. Cut the framing lumber to the required lengths using a circular or miter saw.
- Construct the base: Create a rectangular frame around the fireplace opening. Secure the framing lumber using screws or nails.
- Add vertical supports: If your surround will be tall, attach vertical supports to the base frame.
- Construct the mantle: Measure the length and width of the mantle and cut the lumber. Use brackets to securely attach the mantle to the frame.
4. Applying Sheathing
Sheathing provides a smooth surface for the finish material. It helps to hide any imperfections in the framing and creates a stable foundation for your surround.
- Cut the sheathing: Cut the plywood, MDF, or OSB sheathing to fit the frame using a circular saw.
- Attach the sheathing: Secure the sheathing to the frame using screws or nails. Make sure the sheathing is level and flush with the frame.
- Add insulation: Consider adding insulation to the back of the sheathing for added warmth and energy efficiency.
5. Installing the Finish Material
This is the stage where your fireplace surround truly comes to life. The choice of finish material depends on your personal preferences and design vision.
- Wood: Wood is a classic and versatile choice for fireplace surrounds. Select wood that is resistant to heat and moisture.
- Stone: Stone offers a natural and timeless look. Consider different types of stone, such as granite, marble, limestone, or slate, based on your budget and desired aesthetic.
- Brick: Brick provides a rustic and warm appeal. You can choose from traditional red brick or explore different colors and textures.
- Tile: Tile is a durable and customizable option. Choose from ceramic, porcelain, or natural stone tile.
-
Drywall: Drywall is a cost-effective choice for a contemporary look. Apply drywall tape and compound to create a smooth finish.
-
Prepare the surface: Ensure the sheathing is clean and free of debris before applying the finish material.
- Apply adhesive: Use construction adhesive or mortar to attach the finish material to the sheathing.
- Secure the finish material: Use screws or nails to secure the finish material to the frame.
- Grout or seal: If you are using stone or tile, grout the joints to create a clean finish.
6. Finishing Touches
Once the finish material is installed, you can add finishing touches to personalize your fireplace surround.
- Painting or Staining: Paint or stain the wood or drywall surround to complement your existing decor.
- Adding Molding: Install decorative molding around the edges of the surround to create a more refined look.
- Decorating: Display artwork, candles, or other decorative items on the mantelpiece.
Resources and Tips
- DIY Fireplace Surround Tutorials: Search online for how to build a fireplace surround tutorials and videos.
- Fireplace Surround Plans: Many websites offer free downloadable plans for different styles of fireplace surrounds.
- Safety Precautions: Always wear safety glasses and gloves when working with power tools and sharp objects.
- Building Codes: Check with your local building codes to ensure your fireplace surround meets safety standards.
Frequently Asked Questions
- What is the best material for a fireplace surround? The best material depends on your budget, style preferences, and the level of complexity you are comfortable with. Wood, stone, brick, and tile are popular choices.
- How do I make my fireplace surround fire-safe? Use heat-resistant materials for the surround and follow the manufacturer’s instructions for installing the fireplace.
- How much does it cost to build a fireplace surround? The cost varies greatly depending on the materials, size, and complexity of the project.
Building a fireplace surround is a rewarding project that can add significant value to your home. With careful planning, attention to detail, and a little effort, you can create a beautiful and functional focal point for your living space.
want a fireplace surround that s a showstopper
Transforming Your Fireplace with a Stunning Surround
A fireplace is a focal point of any room, but a drab, uninspired surround can detract from its potential. If you’re looking to elevate your fireplace and create a truly impressive feature, building a surround yourself is a fantastic option. It’s a project that can be tackled by DIY enthusiasts of all skill levels, and the satisfaction of creating something unique for your home is unmatched.
Planning Your Project:
Before you grab your tools, it’s essential to plan your project carefully. This involves several key steps:
- Choosing Your Material: The material for your fireplace surround is a significant decision, impacting both aesthetics and functionality. Popular options include:
- Stone: Offers a timeless, elegant look and excellent durability.
- Brick: Provides a rustic charm and a wide range of styles.
- Wood: Adds warmth and natural beauty, but requires regular maintenance.
- Mantel: A decorative shelf above the fireplace adds storage and display space.
- Design and Style: Consider the overall style of your room and the fireplace itself when choosing the design for your surround. Do you want a classic, modern, or rustic look?
- Measuring and Sketching: Accurate measurements are crucial for a successful project. Sketch out your design and determine the dimensions of your surround.
The Essentials for Success:
Once you have a plan, gather the necessary tools and materials. These may include:
- Level: Essential for ensuring your surround is straight and plumb.
- Tape Measure: For accurate measurements throughout the project.
- Circular Saw: For cutting materials to size.
- Mortar: Used for adhering stone or brick to the existing fireplace.
- Adhesive: Necessary for attaching wood or other materials.
- Safety Glasses and Gloves: For protection during construction.
Building Your Fireplace Surround:
Now it’s time to start building! This process will vary depending on the chosen material, but here are general steps:
- Preparation: Begin by cleaning the existing fireplace area. Remove any old surround materials and prepare the surface for the new surround.
- Framing: If you’re using materials like wood or drywall, you’ll need to create a frame around the fireplace opening.
- Installation: Apply mortar or adhesive to the back of your chosen material and secure it to the fireplace or frame.
- Finishing: Once the surround is installed, finish it with grout, caulk, or paint to create a seamless and attractive look.
Tips for a Professional Finish:
- Take your time: Rushing the project can lead to mistakes.
- Double-check your measurements: Ensure everything fits perfectly before making any cuts.
- Use the right tools: Having the proper tools will make the process smoother.
- Clean up as you go: This will prevent dust and debris from accumulating.
- Pay attention to detail: Small details can make a big difference in the overall appearance of your surround.
Adding Finishing Touches:
Once your fireplace surround is complete, you can add finishing touches to enhance its beauty:
- Mantel: Consider adding a decorative mantel shelf for storage or display.
- Hearth: Create a focal point with a unique hearth design using stone, tile, or other materials.
- Decor: Accessorize with candles, artwork, or plants to create a warm and inviting atmosphere.
A Project You’ll Love:
Building a fireplace surround yourself can be a rewarding project. By following these steps and seeking inspiration from online resources, you can create a stunning focal point for your home that you’ll enjoy for years to come. Remember, if you’re unsure about any steps, don’t hesitate to seek advice from a professional contractor.
Building a Fireplace Surround: Q&A
Q: What materials can I use to build a fireplace surround?
A: You have a lot of options! Popular choices include:
* Stone: Natural stone (slate, granite, limestone) adds rustic charm.
* Brick: Offers a classic look and excellent durability.
* Tile: Ceramic, porcelain, or mosaic tiles can create a variety of styles.
* Wood: Reclaimed wood, shiplap, or beadboard bring warmth and a natural feel.
* Faux stone: Less expensive and easier to work with than real stone.
* Concrete: Versatile and can be customized with different finishes.
Q: What tools do I need to build a fireplace surround?
A: You’ll need the basics:
* Level: Essential for ensuring everything is straight.
* Tape measure: For accurate measurements and cuts.
* Saw: Circular saw or miter saw for precise cuts.
* Hammer: For driving nails and securing materials.
* Screwdriver: For fastening screws.
* Mortar mix: For setting stone or brick.
* Grout: For filling in gaps between tiles.
* Caulk: For sealing gaps and joints.
Q: How do I plan out the design of my fireplace surround?
A: Start with your existing fireplace as a base:
* Measure: Determine the dimensions of your existing fireplace opening.
* Sketch: Draw a rough design to visualize the shape, height, and width.
* Material choice: Consider your desired style and budget.
* Focal point: Decide on a centerpiece (mantel, hearth, or unique tile).
* Lighting: Integrate lighting for visual appeal and functionality.
Q: How do I install a fireplace surround?
A: The process varies by material:
* Stone/Brick: Apply mortar to the back of each piece and lay it on the fireplace.
* Tile: Apply mortar to the wall and lay tiles, ensuring even spacing.
* Wood: Measure, cut, and secure pieces to the wall using screws or glue.
Q: What safety precautions should I take when building a fireplace surround?
A: Prioritize fire safety:
* Clearance: Maintain proper clearance between the fireplace and the surround.
* Heat-resistant materials: Choose materials that can withstand high temperatures.
* Electrical wiring: Keep wiring away from heat sources.
* Ventilation: Ensure proper ventilation to prevent smoke buildup.
* Professional inspection: Have a qualified professional inspect your work for safety.
Q: Can I build a fireplace surround myself?
A: It’s possible, but it depends on your experience and skill level:
* Basic DIY: You can tackle a simple surround with basic tools and instructions.
* Complex projects: For elaborate designs, seek professional help.
* Fireplace modifications: Never modify the fireplace structure without professional assistance.
Q: What are some design tips for a fireplace surround?
A: Here are a few ideas:
* Symmetry: Creates a balanced and elegant look.
* Asymmetry: Adds visual interest and can highlight unique features.
* Contrast: Combine different materials and textures for a dynamic effect.
* Color palette: Choose a color scheme that complements your room’s décor.
* Personal touches: Incorporate your own style with decorative elements.
Related Articles
Conclusion
Creating a custom fireplace surround is a rewarding project that can dramatically enhance your living space. By carefully choosing materials, taking accurate measurements, and following the steps outlined above, you can achieve a beautiful and functional focal point for your home. Remember to prioritize safety throughout the process, and don’t hesitate to seek help from a professional if needed.
Now that you’ve learned how to build a fireplace surround, we’d love to hear from you! Share your experiences, tips, and photos in the comments below. If you enjoyed this post, please share it with your friends and family on social media to inspire others to tackle their own home improvement projects. Happy building!




One Comment