


Vinyl tile glue is the least glamorous purchase on a tile job and the one that decides whether the floor outlives your interest in it. Tiles themselves are nearly identical at any price point.
Two floors can share a tile and a price. What separates them is almost always three things: the adhesive choice, the subfloor prep underneath it, and the trowel discipline on install day. One stays flat for fifteen years. The other sprouts lifted corners by the second summer.
This guide walks those three decisions in order, because that’s the only order that works.
By the end you will know which adhesive family fits which tile — peel-and-stick, glue-down LVT, or classic VCT. You will know how to test whether the subfloor is ready to bond. And you will know what the trowel notches mean, and why the maker’s choice outranks yours.
And how the working clock (open time, set time, cure time) schedules the whole job.
Key Takeaways
- Match adhesive to tile type: pressure-sensitive for LVT tile, tacky set mastic for peel-and-stick reinforcement, high-solids acrylic or urethane for VCT over concrete.
- Peel-and-stick tiles still need adhesive on edges and high-traffic zones — the factory tack alone is a fair-weather bond.
- Flatness tolerance for vinyl tile is tighter than plank: 3/16″ over 10 feet, because a tile corner riding a ridge becomes a lifted corner within months.
- Layout first, glue second — VCT and LVT tile both demand a chalked centerline and a dry-fit before any adhesive bucket opens.
- Roll the field within the hour and again after two: tiles pressed by roller stay flat; tiles pressed only by footsteps hover over bond-starved pockets.
Know Your Tile, Know Your Glue
Three tile families, three adhesive answers. Luxury vinyl tile (LVT) — the wood-look and stone-look tiles that dominate today’s market — pairs with pressure-sensitive adhesive. Releasable enough for a future tile swap, strong enough for rolling traffic.
Vinyl composition tile (VCT), the school-hallway classic, is porous and dimensionally different. It bonds into high-solids acrylic adhesive and — notably — must be rolled hard and maintained with wax. Because VCT itself is the wearing layer.
Peel-and-stick vinyl tile lives by different physics: the factory-applied tack holds in mild rooms, but kitchens, entries. And any sun-warmed floor push it loose at the seams within a couple of seasons. The fix is cheap.
A beadline of pressure-sensitive adhesive under each seam edge and a dab under corners at install turns peel-and-stick from a rental-grade floor into a permanent one. And sheet vinyl adhesive stays out of this job entirely: it’s formulated for full-coverage sheet bonding.
And under tiles it telegraphs every trowel ridge straight through the tile field.
Adhesive Chemistries in Plain Terms
Pressure-sensitive (PS) adhesive is tacky forever by design — a bond that grips tile firmly but releases under deliberate heat and leverage. That releasability is a feature: one cracked tile comes up without excavating the neighbors. And replacement beds into the same tack with a weight overnight.
PS products run water-cleanable, low-VOC, and forgiving of first-timer pacing.
Acrylic high-solids adhesives are the VCT standard: harder initial grab, higher bond strength, built for the porous tile body and heavy public traffic. Urethane sits at the permanent tier — waterproof, structural, warranted below grade and over radiant heat.
And effectively irreversible once cured; bathrooms and entry slabs justify it, bedrooms don’t. Anything labeled “multipurpose mastic” or sold in a tub gallon at the big-box checkout for suspiciously little money is the false economy of this aisle.
It bonds to the tile, then lets go of the subfloor in one Curtainless summer.
Subfloor Readiness: The Thirty-Minute Audit
Concrete: the water-drop test first — a drop that soaks in inside a minute marks porous concrete needing primer before adhesive. A beading drop marks a sealed or densified slab needing scuff-sanding for mechanical tooth. Then flatness by straightedge: vinyl tile tolerates 3/16″ over 10 feet, tighter than plank.
Because tiles are small and rigid enough to bridge-and-rock on ridges, lifting one corner at a time. High spots grind; low spots fill with patch compound rated for adhesive bond. A slab that powders under a fingertip needs powdery concrete treatment before any tile sees adhesive.
Wood: every subfloor panel screwed (not just nailed) into joists, seams filled, ridges sanded. Any spring or squeak present on adhesive day is permanent on day two. Glue transfers the panel’s movement into the tile field as hairline grout-looking cracks along seams.
Both surfaces finish the same way: vacuum, damp-wipe, full dry, then a chalk-free, dust-free check with your hand in the corner no one visits.
Layout Before Adhesive, Always
Tile geometry punishes improvisation. The professional sequence costs twenty minutes and saves the whole room’s look. Snap a centerline through the room’s midpoints, dry-lay a full row of tiles out to each wall.
And check the cut dimensions at the borders. If either wall gets a sliver narrower than a third of a tile, shift the centerline by half a tile. Symmetry beats arithmetic every time in a room people see from a door.
The dry layout also stages thebatch discipline: tile varies shade-by-batch, cartons are numbered. And mixing lots across one field reads as patchwork the moment light rakes across it.
Open cartons in sequence, lay from several at once in rotation, and keep the batch number on the boxes you save for future repairs. Five years from now the shelf-lot match is worth more than the receipt.
Trowel and Set: The Bond Line Discipline
The adhesive data sheet names its notch. Vinyl tile commonly runs a 1/16″ V or a 1/16″ x 1/16″ U. That notch is the whole governance of bond thickness.
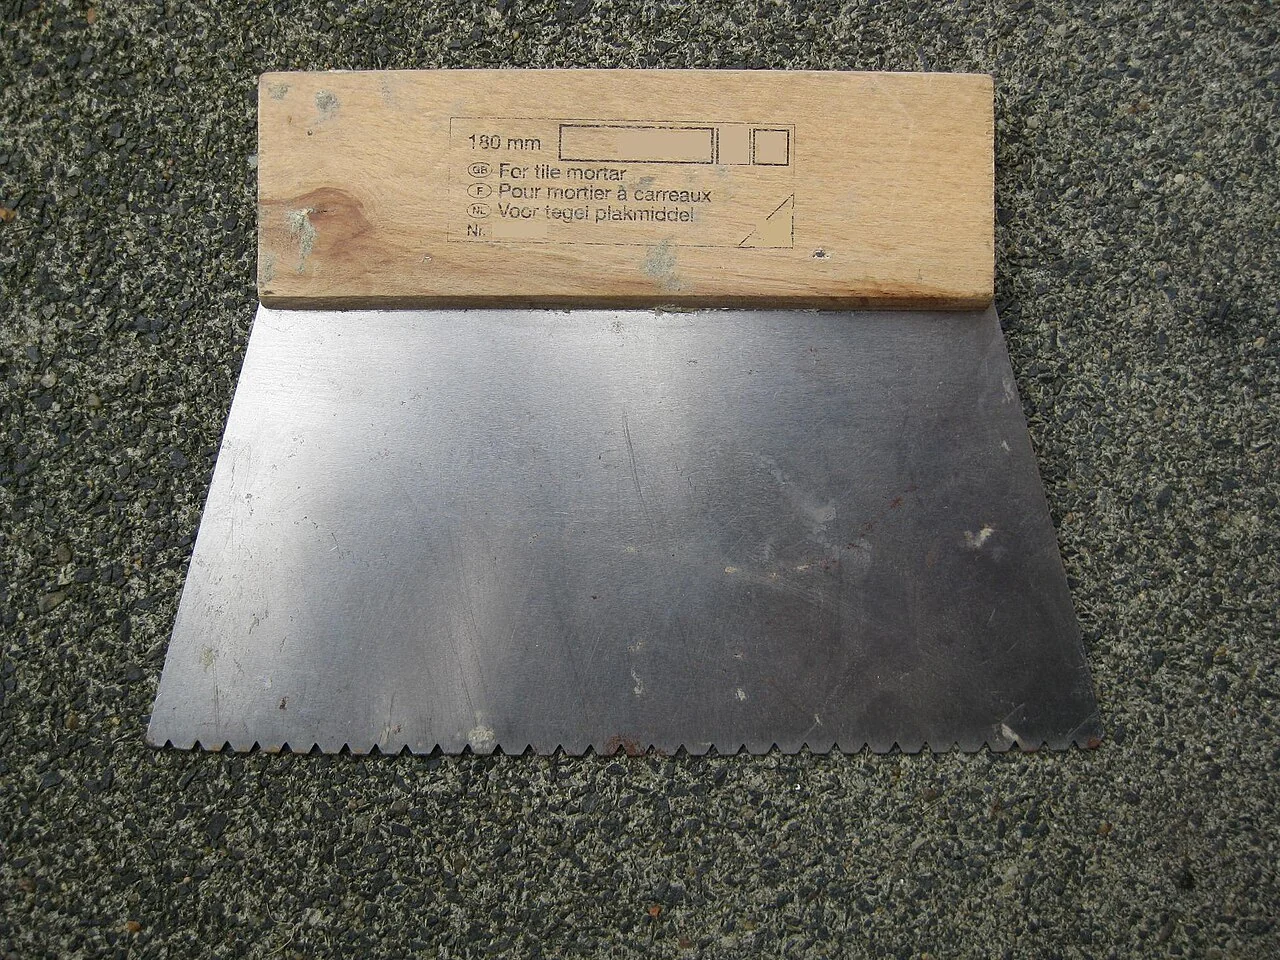
Starving it leaves dry pockets under tile corners, over-applying telegraphs ridges through the wear layer and squeegies adhesive up the seams when tiles get pressed. Hold the trowel near 45°, spread one direction, and stop when you reach the edge of your working window.
Setting technique keeps the seams honest. Lay tiles edge to edge with a hairline seam for LVT; VCT takes its specified gap. Slide, never drop, each tile into the adhesive from the seam edge outward.
A dull blade shreds the edge that was supposed to look machine-cut. Every few rows, sight down the field from both ends. A drift of one degree at row four becomes a full-tile jog by row twelve, and adhesive never forgives repositioning after set.
Open Time, Rolling, and Cure
Open time is the minutes between spreading adhesive and laying tile before it skins. Most PS and acrylic products give 15–30, shorter in heat, longer on cold slabs. Professional pacing is spread-what-you-can-set: a three-tile-wide band, with the skin line always ahead of you.
Once adhesive skins, tiles laid on it bond weakly; the floor looks finished on Tuesday and lives hollow by Friday.
Rolling is the step DIY installs skip and floors remember. A 75–100 lb floor roller over the finished field within the hour — then again at two — presses tile into full contact, collapses ridges. And squeezes air pockets out to the seams.
Cure clocks follow the tub. Light foot traffic after 24 hours typical, furniture 48, wet cleaning a full week out for PS products and longer for urethane.
VCT adds one more deadline. Its factory finish goes down within days of install, following the wax schedule for VCT floors. Uncured-surface VCT drinks dirt like chalk.
Repairs and Releasability
The pressure-sensitive route makes tile repair a one-coffee job. Warm the failed tile with an iron over cloth, lift it with a thin scraper from a corner, scrape the old tack down to flat. And bed a same-lot replacement into the same tack with a weight overnight.
Seams re-kiss under heat because PS adhesive re-tacks. It’s the reason releasable is the sensible default in kitchens and entries, where single-tile losses are a normal decade event.
Urethane repairs are surgical by comparison — the bond is the point, and the point doesn’t release. Acrylic VCT repairs split the difference. Harder to lift than PS, easier than urethane, with the tile’s porosity absorbing adhesive and needing a longer rebed.
The strategic takeaway belongs at purchase. Choose the adhesive by imagining the one-tile repair you’ll make in year six, then buy the chemistry that makes that repair survivable.
Cost and Coverage Math
Coverage runs about 100–140 sq ft per gallon for PS adhesive over primed porous concrete, 150+ over sealed; acrylic VCT adhesive claims similar gallons-to-area.
A 150 sq ft kitchen means a pail and a half to two gallons, or $60–$180 at typical LVT-adhesive pricing. Add primer at $25–$40, a trowel, and roller rental at $25–$40 a day. Peel-and-stick reinforcement needs far less: one gallon covers seams and corners across a whole house.
The numbers that bite are invisible. Buying short stretches a two-day job into two-week-old open pails, and vinyl adhesives skin within days of opening. Skipping primer on a thirsty slab burns 30% more adhesive for a weaker bond.
Budget the full kit on day one — primer, correct notch, roller rental, and one spare tile per twenty for the future repair drawer.
Mistakes to Avoid
- Laying tiles on skinned-over adhesive — the surface looks ready but bonds weakly; hollow-sounding seams and lifted corners within months are the signature.
- Using sheet-vinyl glue or tub “multipurpose mastic” under tile — wrong chemistry and wrong viscosity; ridges telegraph through the tile face like corrugation.
- Skipping the dry layout and centerline shift — perimeter slivers under 2″ read as a mistake from the doorway and can’t be fixed after adhesive cures.
- Not rolling the field — unrolled tiles sit on adhesive ridges, leaving invisible voids that become hollow spots and corner-lifts through the first heating season.
- Opening the whole batch and mixing carton lots across the field — batch-shade variation turns a uniform floor into visible quilting that only full replacement cures.
Frequently Asked Questions
Do peel-and-stick tiles really need extra adhesive?
In kitchens, entries, sunrooms, and anywhere rolling loads or sun heat live — yes. The factory tack is tuned for mild rooms. A thin line of pressure-sensitive adhesive under every seam edge and corner converts the job to a permanent floor.
In a cool, low-traffic bedroom the factory tack alone can hold for years; the extra bead is cheap insurance wherever conditions argue otherwise.
What’s the difference between vinyl tile glue and vinyl plank adhesive?
The chemistry overlaps more than the marketing does — both families run pressure-sensitive, acrylic, and urethane tiers. Tile-specific products account for the tile’s smaller footprint and rigid body: slightly finer notch recommendations, higher tack for the reduced contact area. Plank adhesives flex for long, moving bodies.
If a single pail is rated for both LVT tile and plank, one product can serve the whole renovation honestly.
Can I install vinyl tile over old adhesive residue?
Thin, hard-bonded residue of the same chemistry family survives under new adhesive once loose spots are scraped and the maker’s primer goes over. Thick ridges, asphalt cutback, or anything that powders under a scraper must come off to sound substrate.
Adhesives bond to the top layer they touch, and letting that layer be crumb is financing a future failure. Cutback specifically gets encapsulated, never solvent-washed.
How long before furniture can go back on a glued vinyl tile floor?
Light foot traffic after roughly 24 hours, full furniture at 48–72. And rolling loads (chairs, appliances) at the far end of the maker’s range — the pail’s cure schedule outranks any guide. Return furniture on felt pads, and keep wet mops off for a week on PS products.
Fresh bond plus detergent chemistry is how hazy seams are manufactured.
Why are my tile seams showing dark lines months later?
Two usual suspects. One is squeeze-out left in the seams, which darkens with dirt; wiping seams during install and rolling to close them prevents it. The other is over-application that never pressed flat, leaving a micro-groove that collects gray grime.
The first scrubs out with the maker-approved cleaner; the second only until the corner-lift arrives, then heat-and-replace is the honest fix.
Is VCT worth it over LVT for a home project?
VCT buys commercial durability and the lowest material cost per square foot, and charges it back in labor: it demands precise adhesive, rolling. And — before it’s a year old — a wax or finished-seal regimen, because the tile body is the wear layer.
LVT costs more per box but arrives finished, installs thinner-tolerance simple, and cleans with nothing but the pH-neutral routine. Homes rarely want VCT’s maintenance calendar; offices rarely mind it.
🧪 Free Tool: Adhesive Coverage Calculator
Work out how much adhesive your floor needs — by trowel size and square footage.
Conclusion
Vinyl tile glue rewards the same three virtuous decisions every successful floor hides. Chemistry matched to the tile and room, a subfloor that passed an honest audit, and trowel work that respected the open-time clock. None of it is difficult.
All of it is sequential — and skipping a step doesn’t save time so much as reschedule the failure into next summer.
Buy by the data sheet rather than the bucket slogan, roll the field like you mean it. And keep one tile per twenty in the closet with the batch number taped on. The floor that stays flat for fifteen years isn’t the one with the best marketing.
It’s the one where someone spent an extra thirty minutes with a straightedge before the bucket opened.
Related: best glue for vinyl repair.


