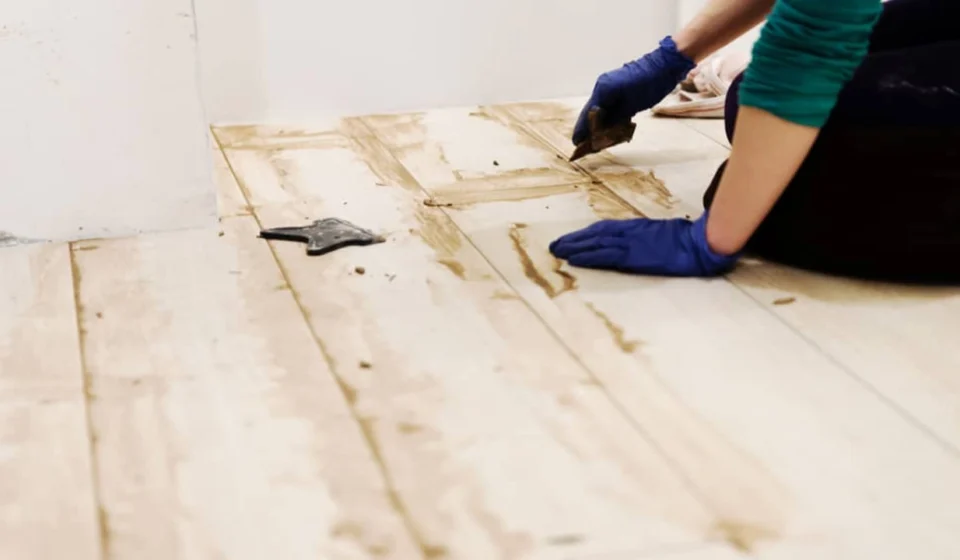

Adhesive where it does not belong is the floor’s most common renovation souvenir. Sometimes it is squeeze-out ridges along the tile seams. Sometimes dried drops from a decades-old install. Sometimes an entire skim of old mastic, revealed when the carpet comes up. Sometimes fresh squeeze-out from your own weekend project, cured before you noticed.
Removing it from vinyl flooring has one golden rule that shapes everything else. The vinyl surface and the adhesive respond to completely different chemistries. So the solvent that dissolves the glue can also dissolve, cloud, or stain the wear layer above it.
The safe sequence is heat and mechanical first, solvent last and sparingly — and the right solvent ranked by how gentle it is on vinyl finish. This guide covers fresh squeeze-out, cured drops and ridges, old mastic fields.
And adhesive residue on the subfloor you’re prepping for a new floor, plus the mistakes that turn a fifteen-minute cleanup into a replacement-tile problem.
Key Takeaways
- Work gentle-to-aggressive: plastic scraper and warmth first, mineral spirits sparingly second, dedicated adhesive remover last — never acetone or lacquer thinner on visible vinyl.
- Fresh squeeze-out wipes off with a damp cloth in seconds; cured squeeze-out needs softening and a plastic edge. The five-minute response saves the fifty-minute scrape.
- Test every solvent on a closet-corner or spare piece first — vinyl wear layers vary, and clouding damage is permanent.
- Old black cutback mastic is a special case: never solvent-wash it (the asphalt satellite’s toxins mobilize); scrape dry or encapsulate per current guidance.
- For subfloor prep, aggressive methods are welcome — the vinyl you’re protecting is gone; the floor you’re protecting is the new bond.
Know Your Adhesive Before You Scrape
Three adhesive families leave different residue, and the family decides the method. Pressure-sensitive tack (the sticky, rubbery layer under peel-and-stick and releasable installs) stays soft indefinitely. It reacts to heat, rolls into balls under a plastic scraper, and dissolves in mineral spirits without touching most wear layers.
Set acrylic mastic (the tan or beige glue under older tile) cures hard and brittle. It prefers soaking and scraping, and hates force applied cold. Urethane residue (the amber, glassy kind) cures to near-epoxy hardness — mechanical removal only, and patience.
Identify before touching: rub a residue edge with a cloth. Tack smears and rolls, cured mastic grits and flakes, urethane does nothing at all. Then note the color-and-location pattern: ridges along tile seams are almost always squeeze-out from install day (same family as the floor’s own bond),.
While fields of tan beneath lifted tiles are the old install’s mastic. The ten-second identification picks the right remover and the right temperature — which is the whole craft in most cases.
Fresh Squeeze-Out: The Five-Minute Save
Squeeze-out along seams — the adhesive line that presses up between tiles or planks as the roller works — comes off in seconds. While it’s still wet: a damp microfiber, one pass, done. The second-best moment is when it’s just skinned but still soft under the surface.
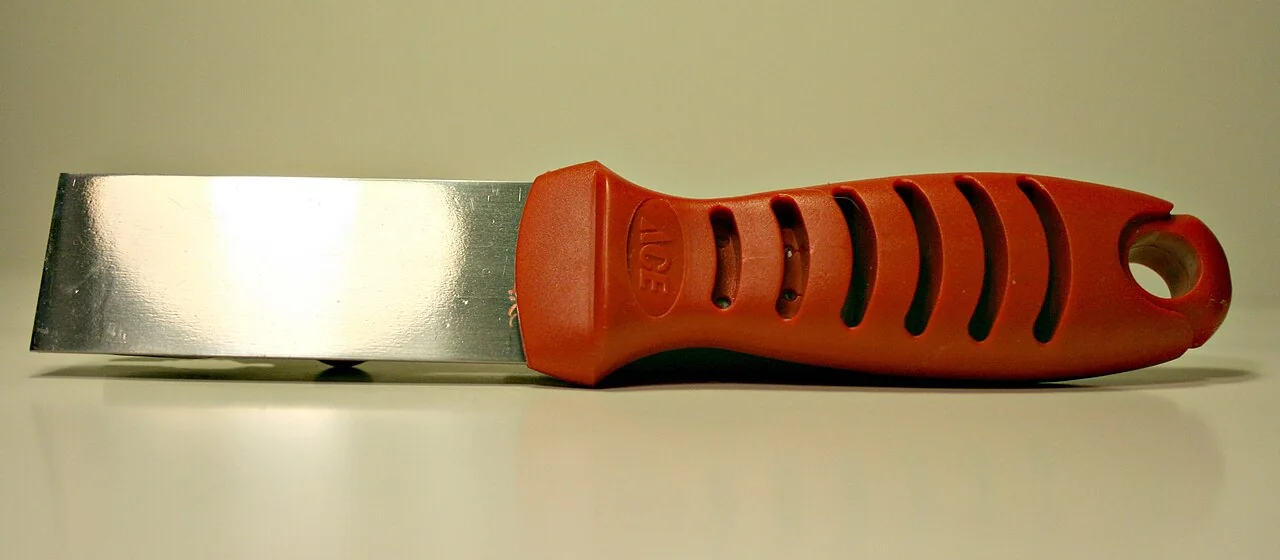
A plastic scraper at a low angle shaves the bead off without dragging adhesive across the texture. What you never do at either stage is solvents. Wet adhesive plus solvent spreads the bead sideways into the texture that makes vinyl look like wood or stone.
Cured squeeze-out is the common case, because not everyone walks the field with a light in the first hour.
The method: warm the bead with a hair dryer, or an iron on low over cloth if the surface tolerates heat and has no gloss film. Then shave with a plastic scraper held nearly flat.
Work in short strokes that push the softened bead ahead of the blade rather than smearing it. What remains is a faint halo — a cloth dampened with mineral spirits, tested first, fades it.
Steel wool never touches the wear layer on this job: it scratches the texture permanently and the scratch collects gray grime forever after.
Cured Drops and Old Splatter: Heat, Then Chemistry
Adhesive drops from another trade’s project (painters are the usual source) cure into dome-shaped beads that resist both scraping and solvents cold.
The reliable sequence starts with heat. Warm the bead with a hair dryer until a test poke shows give. Lift from the edge with the plastic scraper; beads usually release whole. Tack-type residue responds to the same trick on a larger scale.
An iron over cloth softens a palm-size patch of old tack enough to roll it off in ribbons.
When heat isn’t allowed — glossy finish floors, or surfaces with a heat-sensitive printed wear layer — chemistry does the softening instead.
Mineral spirits on a cloth softens most tack and acrylic residue enough to scrape. Press it onto the spot for five to ten minutes under plastic film, which stops evaporation. Dedicated citrus-based adhesive removers work similarly and smell better. Both still get the spot-test first.
Because the difference between “removes adhesive” and “removes adhesive and the floor’s satin finish” is a wear-layer formulation you can’t see.
Old Mastic Fields: The Full-Surface Problem
A full field of old adhesive — what’s under glued vinyl tile when it comes up during renovation — changes the job from spot-removal to substrate management. And the decision tree starts with one look: is the residue tan/amber (water-based acrylic or tack) or black (asphalt cutback)?
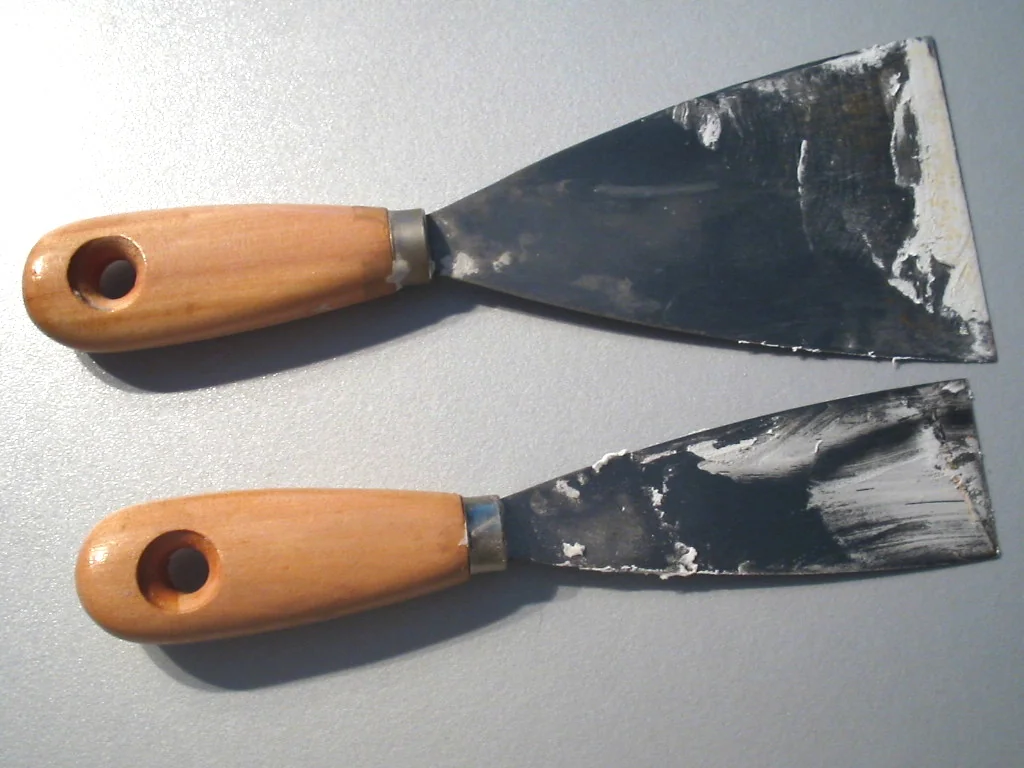
Tan fields have a straightforward path: hot-water-and-dish-soap soaking in sections, wait, then a long-handled floor scraper. The residue softens and rolls under the blade. Stubborn patches take the mineral-spirits treatment section-by-section with good ventilation.
Black cutback is the legal-and-health case: it may contain asbestos in pre-1980s homes, and it responds to solvents by mobilizing toxics across the slab. Current practice is never to solvent-wash or sand it.
The approved routes are narrow. Dry scraping with HEPA filtration is one. The other is leaving the cutback in place and encapsulating it with a rated sealer, once it is well bonded and flat. Then floor over it with adhesives rated for cutback encapsulation.
When in doubt about era or composition, a lab test costs less than any alternative that starts with “I assumed.”
Adhesive on the Subfloor: Prep for the New Bond
When the vinyl is being replaced, the rules flip. There is no wear layer left to protect, and the new floor’s bond depends on what you leave behind. The targets are ridges and loose islands, not perfect cleanliness.
Thin, hard-bonded residue of the same chemical family is usually fine. Scrape the loose spots flat, then let the adhesive maker’s primer go over it.
What must go: anything that powders under a scraper, ridges you can feel with a straightedge, and all cutback unless you are encapsulating it. Those ridges telegraph through the new floor.
The tool chain is short. A long-handled 4″ floor scraper handles the fields, rented with weighted heads for a fraction of strip-agent pricing. A heat gun covers stubborn patches. A light skim of leveling compound finishes the whole surface.
That skim locks micro-residue into a smooth, bondable plane, and costs about one bag for an average room. The old-timer’s solvent flood stays banned, for the cutback reason above and because solvent-soaked slabs poison the new adhesive’s cure for months.
Modern practice preps with heat, blades, and primer. Not a gallon of thinner and optimism.
Solvent Guidance: What’s Safe on Vinyl, What’s Not
Ranked from safest to most dangerous for the vinyl wear layer itself.
Ranked from safest to most dangerous for the wear layer: water and dish soap, harmless and weak. Then isopropyl alcohol, mild and good on tack residue, still tested. Then mineral spirits, effective on tack and acrylic, with mild dulling risk on some satin finishes. Last the citrus d-limonene removers: strong, effective, and a bigger visual risk than spirits.
And the never-list: acetone, lacquer thinner, nail-polish remover, brake cleaner. All of which can dissolve vinyl finish, cloud the wear layer, or permanently matte a gloss floor in one wipe.
Procedure rules keep even the safe solvents safe: test in a closet or on a removed spare piece and compare against raking light. Apply to a cloth rather than the floor (the floor should never have a puddle).
Work palm-size patches with dwell time under plastic film; wipe with a clean damp cloth afterward to stop the solvent’s action; and ventilate. These are all volatile organics, and a lidded room concentrates them at face height.
One more rule. No solvents at all on luxury vinyl with a welded or heat-seamed installation, not until the sheet’s care guide clears it. Seams are the first casualty.
Special Cases and When to Stop
Three situations change the calculus. Textured embossed vinyl (deep wood-grain or stone texture) holds residue in its valleys beyond what any scraper reaches. The fix is a soft brush with the warmed solvent-of-choice, working the texture, then blotting.
Expect slow going and protect the surrounding area from tool slips. Gloss-finish LVT tolerates neither steel wool nor heat above warm-to-touch — on gloss, the plastic-scraper-plus-dwell-time method is the whole toolkit. And stamped-seam sheet vinyl (where the installer cut and re-welded seams) treats solvents as suspect at the seams specifically.
Seamed areas take water-based methods only.
The stop-rule is economic. When a residue patch costs more time than the tile is worth, the answer is a new piece, not a fourth remover. If the surface is already torn or an edge has lifted, removal is only half the job — our guide to vinyl flooring repair glue covers the patch products that hold under foot traffic. The same holds once the wear layer has already gone cloudy from an earlier attempt.
Vinyl rewards patience but punishes stubbornness: every pass with a wrong-grade tool is a scratch that outlives the cleanup.
Cost and Kit: What This Actually Runs
The homeowner kit is small. Two plastic scrapers in different widths, $5–$10. A hair dryer or basic heat gun you likely own, $0–$40. Microfiber cloths, dish soap, mineral spirits at $10 a quart, and a citrus remover at $12 if the residue is heavy. For field jobs, a long-handled floor scraper rental at $15–$30 a day.
Every real-world job in a single room lands under $50 in consumables; the cost that matters is time. Seams take minutes each, drops take five to ten apiece. And a full mastic field is a half-day of steady scraping per room with breaks.
The expensive version is the one bought by skipping the test patch: clouded wear layer can’t be re-cleared.
A scratched texture also collects grime no cleaner lifts. Both failures turn free residue into new vinyl at $3–$8 per square foot. The kit’s cheapest item is the insurance policy: a spare tile or offcut kept from install day. Its test surface matches the floor exactly, which no closet corner can promise when light rakes across it.
Mistakes to Avoid
- Starting with acetone or “nail-polish-strength” solvents on visible vinyl — the classic permanent-clouding move; test patch first, mildest solvent first.
- Using steel wool or green scrub pads on the wear layer — the scratches hold grime permanently and show as gray paths in raking light.
- Scraping cured adhesive cold and hard — without heat or dwell-time softening, the blade slips, gouges the texture, and the gouge outlives the glue.
- Solvent-washing black asphalt cutback — mobilizes toxics across the slab and creates a hazard; dry-scrape or encapsulate instead.
- Letting solvent evaporate off the floor instead of wiping — undried solvent carries dissolved adhesive deeper into texture; every application ends with a clean damp wipe.
Frequently Asked Questions
What removes adhesive from vinyl flooring most safely?
Heat plus a plastic scraper. A hair dryer softens tack and most acrylic residue enough to shave off without any chemistry touching the wear layer.
When chemistry is needed, mineral spirits on a cloth is the gentle standard. Test in a hidden spot first, apply to the cloth rather than the floor, and wipe clean afterward. The safest answer is always the sequence, not a single product.
Will acetone damage vinyl plank flooring?
It can — acetone and similar thinners attack many vinyl wear layers, causing clouding, matte patches, or softening, sometimes on first contact. Some urethane-topcoat products tolerate a brief wipe, but there’s no visual way to know yours does.
Keep acetone off visible flooring entirely; if a residue demands it, the test on a spare piece decides — never the living-room floor.
How do I remove dried adhesive from vinyl tile seams?
Warm the seam bead with a hair dryer until a probe shows give. Shave with a plastic scraper held nearly flat, so the bead rolls ahead of the blade. Then fade the remaining halo with a mineral-spirits-dampened cloth. The dried seam is one of the friendliest versions of this job.
The bead is small, defined, and usually the same releasable chemistry as the floor’s own adhesive.
Is Goo Gone safe on vinyl floors?
The citrus-based original usually is — on the wear layer — but it’s a strong d-limonene product. And satin or low-sheen finishes occasionally dull under it, which is why the hidden-spot test is non-negotiable.
Apply to a cloth, work the patch, dwell a few minutes, scrape or wipe, then clean the area with soap and water to stop the action. Goo Gone’s adhesive-remover line has variants; the label’s “safe for finished floors” claim still gets the same test treatment.
How do I get old carpet adhesive off a floor I’m re-doing anyway?
Aggressively works here, because there is no wear layer to protect. A long-handled floor scraper, rented with a weighted head, clears tack and acrylic fields at a satisfying pace on a hot afternoon. A heat gun handles the stubborn islands.
Leave thin, hard-bonded, same-family residue in place under a skim of leveling compound and the new adhesive’s primer. Everything powdery, ridged, or black (cutback) comes off or gets encapsulated per current guidance.
Why did my vinyl go cloudy where I removed adhesive — and can it be fixed?
Clouding means the solvent or abrasive affected the wear layer’s finish, not just the residue. Most often from an untested strong solvent or an abrasive pad. It’s permanent in the practical sense: no cleaner restores it, and polishing products leave it glossy-but-wrong in patches.
The honest fixes are replacing the affected plank or tile (the reason install-day spares are kept) or accepting a character mark in a low-visibility spot. Prevention — test patch, mild-first sequence — is the whole cure.
🧪 Free Tool: Adhesive Coverage Calculator
Work out how much adhesive your floor needs — by trowel size and square footage.
Conclusion
Getting adhesive off vinyl flooring is a sequence, not a solvent: identify the glue, protect the wear layer, heat and scrape before anything stronger. And let chemistry — mild, tested, cloth-applied — finish what mechanics started.
Almost every horror story in this niche starts with someone reaching for the strongest bottle on the shelf first. Almost every happy ending starts with a hair dryer and a plastic blade.
Work the five-minute principle from the other side too: fresh squeeze-out wiped today never becomes a weekend project. And a spare tile in the closet pays for itself the first time you need an honest test surface.
The floor beneath the glue is almost always fine — the job is reaching it without making the problem louder.